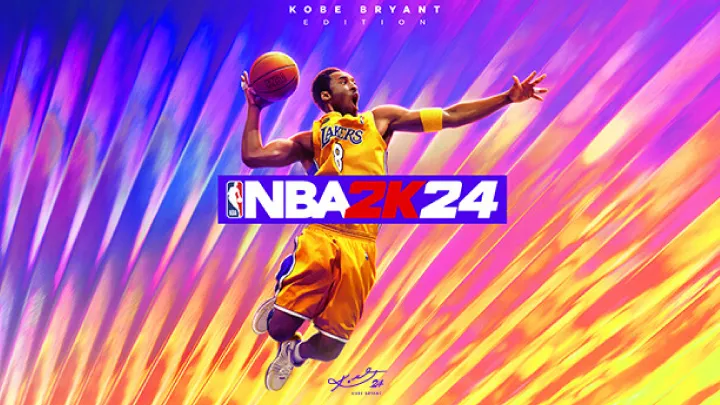
Badges in NBA 2K24 are one of the most influential mechanics that shape how your MyPLAYER performs on the court. While attributes determine the base of your skills, badges act as enhancers, giving you advantages in specific scenarios like shooting under pressure, locking down defenders, or finishing through contact. Many players misunderstand how badges function or apply them without a cohesive strategy, leading to wasted badge points and underwhelming performance. In this article, we will dive deep into the step-by-step process of using badges effectively, from understanding their tier system to building them around your playstyle and applying them in both single-player and online competitive modes.
1. Understanding the Badge System in NBA 2K24
The first step to using badges effectively is gaining a full understanding of the badge system itself. NBA 2K24 reintroduces certain mechanics from past versions while adding a few new layers, such as tiered badge categories and seasonal adjustments.
Badges are divided into four primary skill areas: Finishing, Shooting, Playmaking, and Defense/Rebounding. Each badge enhances specific actions within those skill sets. What makes 2K24 unique is the tier structure—Tier 1, Tier 2, and Tier 3—which determines how costly badges are in terms of badge points and how powerful their effects are.
Badge Tiers Explained
- Tier 1 badges are low-cost but often less impactful.
- Tier 2 badges provide balanced benefits at a moderate cost.
- Tier 3 badges are the most powerful but also require the most investment.
Understanding this hierarchy is essential before committing badge points. Wasting too many points on low-impact badges can cripple your build, while overloading Tier 3 badges without synergy can make your player inefficient.
2. Evaluating Your Playstyle Before Choosing Badges
Badges should never be chosen randomly; they must reflect how you play. Every player falls into a style category—slasher, sharpshooter, playmaker, or defensive anchor—and badges should reinforce those tendencies.
If you drive to the rim frequently, Finishing badges like Posterizer or Fearless Finisher are invaluable. If your strength is shooting from deep, badges like Limitless Range or Deadeye should be prioritized. The key lies in choosing badges that align with your tendencies rather than spreading them thin across categories.
Questions to Ask Yourself Before Selecting Badges
- Do I shoot more off the dribble or catch-and-shoot?
- Do I prefer isolation plays or team-oriented passing?
- Am I a perimeter defender or a rim protector?
By answering these, you’ll create a more focused badge allocation that maximizes efficiency.
3. Building a Strong Badge Core Around Attributes
Attributes and badges must complement one another. For example, equipping Hall of Fame Deadeye on a player with a low three-point rating is a waste. Similarly, using Anchor on a guard with poor block ratings won’t deliver results.
Attribute-to-Badge Synergy
- High Driving Dunk + Posterizer = Consistent highlight dunks.
- High Ball Handle + Quick First Step = Unstoppable blow-bys.
- High Perimeter Defense + Clamps = Lockdown defense on guards.
Case Example
A player with 93 Three-Point Shot should prioritize badges like Limitless Range, Agent 3, and Catch & Shoot to capitalize on their strengths.
This balance ensures that every badge amplifies an existing strength rather than trying to cover weaknesses.
4. The Importance of Core Badges in 2K24
Core Badges are one of the newest systems in NBA 2K24. They allow you to equip a badge without it counting against your badge points, essentially giving you a free slot for one badge per category. However, you must earn the right to core a badge by fulfilling gameplay requirements tied to that badge.
How to Unlock Core Badges
For example, if you want to core Posterizer, you’ll need to attempt and complete a set number of dunks in contested situations. This forces players to use the badge actively rather than equipping it passively.
Strategically, coring a Tier 3 badge can free up points for additional Tier 1 and Tier 2 options, creating a balanced yet powerful badge loadout.
5. Maximizing Shooting Badges Effectively
Shooting badges remain some of the most popular in NBA 2K24. With defenses tightening online, you need to carefully stack shooting badges to ensure you can score consistently.
Must-Have Shooting Badges
- Limitless Range (expands shooting ability beyond the arc)
- Deadeye (ignores late closeouts)
- Agent 3 (boosts pull-up and spin jumpers)
Stacking Shooting Badges
The most effective shooters don’t rely on just one badge. Combining Catch & Shoot with Limitless Range ensures deadly accuracy on both spot-ups and long-range bombs.
6. Maximizing Finishing Badges Effectively
Finishing badges help slashers and inside scorers thrive. With stronger rim protection mechanics in NBA 2K24, these badges are essential to scoring in the paint.
Must-Have Finishing Badges
- Posterizer (increases dunk success on defenders)
- Fearless Finisher (reduces penalty on contact layups)
- Acrobat (improves reverse and acrobatic layups)
The Importance of Contact Scenarios
Finishing badges truly shine when defenders crowd the paint. By stacking Posterizer and Fearless Finisher, you can consistently power through rim protectors.
7. Maximizing Playmaking Badges Effectively
Playmaking badges determine how well you create opportunities for yourself and your teammates. In NBA 2K24, speed and passing vision are crucial to breaking defenses.
Must-Have Playmaking Badges
- Quick First Step (explosive acceleration out of dribble moves)
- Unpluckable (reduces chances of being stripped)
- Dimer (boosts teammates’ shot percentage after passes)
Offensive Flow
Playmakers thrive when combining badges. Quick First Step breaks down the defense, while Dimer ensures teammates capitalize on open looks.
8. Maximizing Defensive and Rebounding Badges Effectively
Defensive and Rebounding badges are essential in both MyCAREER and online Pro-Am games. They dictate whether you can lock down opponents, protect the rim, or dominate the glass.
Must-Have Defensive Badges
- Clamps (improves ability to stay in front of ball handlers)
- Anchor (boosts rim protection)
- Rebound Chaser (increases rebounding range)
Synergy Between Defensive Badges
Pairing Clamps with Glove can make perimeter defenders nearly unbreakable, while Anchor combined with Pogo Stick gives centers elite rim protection.
9. Adapting Badge Loadouts for Different Game Modes
Not every badge setup works across all game modes. What works in MyCAREER might not be optimal in Rec, Pro-Am, or The Park.
Badge Adjustments by Mode
- MyCAREER: Focus on badges that match your archetype.
- The Park: Prioritize versatile badges since matchups vary.
- Pro-Am/Rec: Team synergy is key—equip badges that complement teammates.
This adaptability ensures you remain effective regardless of where you play.
10. Experimenting, Testing, and Adjusting Badges
The best players don’t stick to one badge loadout forever. They test new combinations, analyze gameplay, and make adjustments. NBA 2K24 encourages experimentation, especially with seasonal updates and balance patches.
How to Test Badges
- Use scrimmages or practice modes to try new setups.
- Analyze shot percentages, defensive stops, or assist numbers with different badges equipped.
- Watch competitive 2K streamers to see evolving meta badge combinations.
This iterative process ensures your badge usage evolves with the game.
11. Conclusion
Badges in NBA 2K24 are far more than simple upgrades—they are the foundation of building an elite MyPLAYER. To use them effectively, players must understand the badge system, evaluate their playstyle, build a badge core around attributes, and adapt across different modes. By stacking complementary badges in shooting, finishing, playmaking, and defense, you create a MyPLAYER who thrives under any circumstance. The key is synergy, experimentation, and continuous adjustment. Mastering badges is not just about equipping the strongest ones, but about making them fit seamlessly into your gameplay identity.
